# MongoDB连接数据库 💙
# MongoDB的安装
以下是在windows电脑上安装
点击exe程序一步一步向下安装直到结束
配置path环境,找到C:\Program Files\MongoDB\Server\3.4\bin这个目录。电脑属性==》高级==》环境变量==》编辑path==》添加刚刚这个目录到path
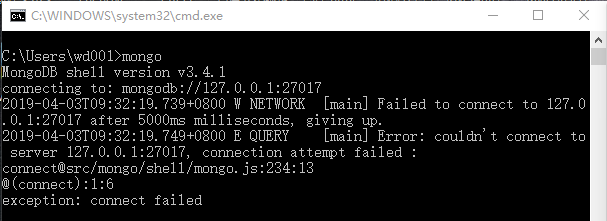
打开cmd,输入mongo,出现以下这些就说明配置成功了
# 数据库的连接与使用
新建mongo文件夹,复制目录路径
开启服务,打开cmd,输入以下命令
mongod --dbpath 文件路径
- 管理数据库,打开cmd,输入以下命令
提示
此时需要打开另一个cmd,第一次连接的那个也不可以关
mongo
- 新版的mongodb不需要第二步的步骤,直接mongo就行了
# 数据库的增删改查
以下是在第二次cmd中操作的
# 查看所有数据库
> show dbs
admin  0.000GB
local  0.000GB
2
3
# 清屏
> cls
# 使用并创建数据库
提示
use就代表了已经创建这个数据库了
> use <数据库名字>
举例
> use school
# 删除数据库
> db.dropDatabase()
# 添加数据
提示
集合名字自定义,在 MongoDB 中,你不需要创建集合。当你添加一些文档时,MongoDB 会自动创建集合。
> db.<集合名字>.insert({"":""})
举例
> db.class.insert({"name":"3年级"},{"name":"4年级"})
WriteResult({ "nInserted" : 1 })
2
# 显示数据库下面的所有集合
> show collections
# 查询文档
> db.<集合名字>.find()
- 查询所有数据
> db.<集合名字>.find({})
举例
> db.student.find({})
{ "_id" : ObjectId("5c89d9791eae9c63db0e378b"), "name" : "小红", "age" : "1" }
{ "_id" : ObjectId("5c89d9941eae9c63db0e378c"), "name" : "丽丽", "age" : "51" }
2
3
- 按条件查询数据 以下查询都是以举例子的形式展现,具体用法参考例子
举例,查找一条数据
> db.student.findOne()
{ "_id" : ObjectId("5c89d9791eae9c63db0e378b"), "name" : "小红", "age" : "1" }
2
举例,查询年龄等于12的学生
> db.student.find({age:"12"})
{ "_id" : ObjectId("5c89db361eae9c63db0e378d"), "name" : "wangwu", "age" : "12" }
2
举例,查询年龄大于12的学生
> db.student.find({age:{$gt:"22"}})
{ "_id" : ObjectId("5c89d9941eae9c63db0e378c"), "name" : "丽丽", "age" : "51" }
{ "_id" : ObjectId("5c89db3d1eae9c63db0e378e"), "name" : "wangwu", "age" : "32" }
{ "_id" : ObjectId("5c89db461eae9c63db0e378f"), "name" : "wangwu566", "age" : "32" }
{ "_id" : ObjectId("5c89db591eae9c63db0e3790"), "name" : "baby", "age" : "52" }
2
3
4
5
举例,查询年龄小于22的学生
> db.student.find({age:{$lt:"22"}})
{ "_id" : ObjectId("5c89d9791eae9c63db0e378b"), "name" : "小红", "age" : "1" }
{ "_id" : ObjectId("5c89db361eae9c63db0e378d"), "name" : "wangwu", "age" : "12" }
2
3
举例,查询年龄小于等于12的学生
> db.student.find({age:{$lte:"12"}})
{ "_id" : ObjectId("5c89d9791eae9c63db0e378b"), "name" : "小红", "age" : "1" }
{ "_id" : ObjectId("5c89db361eae9c63db0e378d"), "name" : "wangwu", "age" : "12" }
2
3
举例,查询年龄为1或者年龄为12的数据
> db.student.find({$or:[{age:"1"},{age:"12"}]})
{ "_id" : ObjectId("5c89d9791eae9c63db0e378b"), "name" : "小红", "age" : "1" }
{ "_id" : ObjectId("5c89db361eae9c63db0e378d"), "name" : "wangwu", "age" : "12" }
2
3
举例,查询年龄大于12小于52的学生
> db.student.find({age:{$lt:"52",$gt:"12"}})
{ "_id" : ObjectId("5c89d9941eae9c63db0e378c"), "name" : "丽丽", "age" : "51" }
{ "_id" : ObjectId("5c89db3d1eae9c63db0e378e"), "name" : "wangwu", "age" : "32" }
{ "_id" : ObjectId("5c89db461eae9c63db0e378f"), "name" : "wangwu566", "age" : "32" }
2
3
4
举例,查询名字中有wangwu的学生
> db.student.find({name:/wangwu/})
{ "_id" : ObjectId("5c89db361eae9c63db0e378d"), "name" : "wangwu", "age" : "12" }
{ "_id" : ObjectId("5c89db3d1eae9c63db0e378e"), "name" : "wangwu", "age" : "32" }
{ "_id" : ObjectId("5c89db461eae9c63db0e378f"), "name" : "wangwu566", "age" : "32" }
2
3
4
举例,查询名字中以小开头的学生
> db.student.find({name:/^小/})
{ "_id" : ObjectId("5c89d9791eae9c63db0e378b"), "name" : "小红", "age" : "1" }
2
举例,查询指定列 name的数据
> db.student.find({},{name:1})
{ "_id" : ObjectId("5c89d9791eae9c63db0e378b"), "name" : "小红" }
{ "_id" : ObjectId("5c89d9941eae9c63db0e378c"), "name" : "丽丽" }
{ "_id" : ObjectId("5c89db361eae9c63db0e378d"), "name" : "wangwu" }
{ "_id" : ObjectId("5c89db3d1eae9c63db0e378e"), "name" : "wangwu" }
{ "_id" : ObjectId("5c89db461eae9c63db0e378f"), "name" : "wangwu566" }
{ "_id" : ObjectId("5c89db591eae9c63db0e3790"), "name" : "baby" }
{ "_id" : ObjectId("5c89df6f1eae9c63db0e3791"), "name" : "小刚" }
2
3
4
5
6
7
8
举例,查询按照年龄排序,升序1,降序-1
> db.student.find().sort({age:1})
{ "_id" : ObjectId("5c89d9791eae9c63db0e378b"), "name" : "小红", "age" : "1" }
{ "_id" : ObjectId("5c89db361eae9c63db0e378d"), "name" : "wangwu", "age" : "12" }
{ "_id" : ObjectId("5c89db3d1eae9c63db0e378e"), "name" : "wangwu", "age" : "32" }
{ "_id" : ObjectId("5c89db461eae9c63db0e378f"), "name" : "wangwu566", "age" : "32" }
{ "_id" : ObjectId("5c89d9941eae9c63db0e378c"), "name" : "丽丽", "age" : "51" }
{ "_id" : ObjectId("5c89db591eae9c63db0e3790"), "name" : "baby", "age" : "52" }
2
3
4
5
6
7
举例,查询前3条数据
> db.student.find().limit(3)
{ "_id" : ObjectId("5c89d9791eae9c63db0e378b"), "name" : "小红", "age" : "1" }
{ "_id" : ObjectId("5c89d9941eae9c63db0e378c"), "name" : "丽丽", "age" : "51" }
{ "_id" : ObjectId("5c89db361eae9c63db0e378d"), "name" : "wangwu", "age" : "12" }
2
3
4
举例,查询后3条以后的数据
> db.student.find().skip(3)
{ "_id" : ObjectId("5c89db3d1eae9c63db0e378e"), "name" : "wangwu", "age" : "32" }
{ "_id" : ObjectId("5c89db461eae9c63db0e378f"), "name" : "wangwu566", "age" : "32" }
{ "_id" : ObjectId("5c89db591eae9c63db0e3790"), "name" : "baby", "age" : "52" }
{ "_id" : ObjectId("5c89df6f1eae9c63db0e3791"), "性别" : "男", "name" : "小刚" }
2
3
4
5
举例,查询2-5之间的数据
> db.student.find().limit(3).skip(2)
{ "_id" : ObjectId("5c89db361eae9c63db0e378d"), "name" : "wangwu", "age" : "12" }
{ "_id" : ObjectId("5c89db3d1eae9c63db0e378e"), "name" : "wangwu", "age" : "32" }
{ "_id" : ObjectId("5c89db461eae9c63db0e378f"), "name" : "wangwu566", "age" : "32" }
2
3
4
举例,查询总条数
> db.student.find().count()
7
2
# 修改数据
举例,修改名字叫小红的,改成15岁
> db.student.update({"name":"小红"},{$set:{"age":"15"}})
WriteResult({ "nMatched" : 1, "nUpserted" : 0, "nModified" : 1 })
2
如果想要完整替换,就不要出现关键字$set
> db.student.update({"name":"小红"},{"age":"15"})
WriteResult({ "nMatched" : 1, "nUpserted" : 0, "nModified" : 1 })
> db.student.find()                              })
{ "_id" : ObjectId("5c89d9791eae9c63db0e378b"), "age" : "15" }
{ "_id" : ObjectId("5c89d9941eae9c63db0e378c"), "name" : "丽丽", "age" : "51" }
{ "_id" : ObjectId("5c89db361eae9c63db0e378d"), "name" : "wangwu", "age" : "12" }
2
3
4
5
6
# 删除数据
db.<collectionsNames>.remove({})
举例,删除年龄22岁的
> db.student.remove({"age":"32"})
WriteResult({ "nRemoved" : 2 })
> db.student.find()
{ "_id" : ObjectId("5c89d9791eae9c63db0e378b"), "age" : "15" }
{ "_id" : ObjectId("5c89d9941eae9c63db0e378c"), "name" : "丽丽", "age" : "51" }
{ "_id" : ObjectId("5c89db361eae9c63db0e378d"), "name" : "wangwu", "age" : "12" }
{ "_id" : ObjectId("5c89db591eae9c63db0e3790"), "name" : "baby", "age" : "52" }
{ "_id" : ObjectId("5c89df6f1eae9c63db0e3791"), "性别" : "男", "name" : "小刚" }
2
3
4
5
6
7
8
# 删除集合
db.collectionsNames.drop()
举例
> show collections
class
student
> db.class.drop()
true
> db.class.drop()
false
> show collections
student
>
2
3
4
5
6
7
8
9
10
# MongoDB索引
索引是对数据库表中一列或多列的值进行排序的一种结构,可以让我们查询数据库变得更快。数字 1 表示 username 键的索引按升序存储,-1 表示 age 键的索引按照降序方式存储
# 索引限制
- 每个索引占据一定的存储空间,在进行插入,更新和删除操作时也需要对索引进行操作。所以,如果你很少对集合进行读取操作,建议不使用索引。
- 由于索引是存储在内存(RAM)中,你应该确保该索引的大小不超过内存的限制。 如果索引的大小大于内存的限制,MongoDB会删除一些索引,这将导致性能下降。
- 最大范围
- 集合中索引不能超过64个
- 索引名的长度不能超过128个字符
- 一个复合索引最多可以有31个字段
# 创建索引
> db.student.ensureIndex({"name":1})
{
        "createdCollectionAutomatically" : false,
        "numIndexesBefore" : 2,
        "numIndexesAfter" : 2,
        "note" : "all indexes already exist",
        "ok" : 1
}
2
3
4
5
6
7
8
# 获取当前集合的索引
> db.student.getIndexes()
[
        {
                "v" : 2,
                "key" : {
                        "_id" : 1
                },
                "name" : "_id_",
                "ns" : "school.student"
        },
        {
                "v" : 2,
                "key" : {
                        "name" : 1
                },
                "name" : "name_1",
                "ns" : "school.student"
        },
        {
                "v" : 2,
                "key" : {
                        "age" : 1
                },
                "name" : "age_1",
                "ns" : "school.student"
        }
]
2
3
4
5
6
7
8
9
10
11
12
13
14
15
16
17
18
19
20
21
22
23
24
25
26
27
# 删除索引
> db.user.dropIndex({"name":1})
{
        "ok" : 0,
        "errmsg" : "ns not found",
        "code" : 26,
        "codeName" : "NamespaceNotFound"
}
2
3
4
5
6
7
# 使用import和export导入导出数据
提示
以下操作要退出当前mongo环境
# 使用import导入数据
mongoimport -d <数据库名字> -c <集合名字> --file <当前数据的路径>
提示
当前数据的路径 可以直接把文件夹拖进来就可以生成路径
导入的json格式如下所以,
{
    "title": "平台",
    "children": [{
            "link": "https://github.com/",
            "title": "github",
            "description": "github平台"
        }
    ]
}
{
    "title": "JAVASCRIPT",
    "children": [{
            "link": "https://www.sitepoint.com/",
            "title": "javascript-no-jquery",
            "description": "js写法"
        }

    ]
}
2
3
4
5
6
7
8
9
10
11
12
13
14
15
16
17
18
19
# 使用export导出数据
- 查看帮助
mongoexport --help
- 基础版
TIP
导出的路径要写完具体的路径,例如C:/blog/list.json
mongoexport -d <数据库名> -c <集合名> -o <导出的路径>
3.加密版
mongoexport -u <用户名> -p <密码> -d <数据库名> -c <集合名> -o <导出的路径>
- 报错
❓报错信息:error connecting to db server: server returned error on SASL authentication step: Authentication failed.
✔️解决方法:
加上--authenticationDatabase admin
❓报错信息'mongoimport' 不是内部或外部命令,也不是可运行的程序
✔️解决方法: 首先看有没有退出当前环境,如果已经退出当前环境还报错的话,说明没有安装mongoimport与mongoexport工具,下载https://www.mongodb.com/try/download/database-tools,然后配置环境变量。
# 使用node操作数据库
文档参考地址:http://mongodb.github.io/node-mongodb-native/3.1/quick-start/quick-start/
以下是参考示例,具体看文档
# nodejs连接数据库
控制台输入node app.js,刷新页面http://localhost:8020/ 出现数据库连接成功就代表连上数据库了
const MongoClient = require('mongodb').MongoClient;
const assert = require('assert');
const express = require("express");
const app = express()
const url = 'mongodb://localhost:27017';

// Database Name
const dbName = 'school';

// Create a new MongoClient
const client = new MongoClient(url, { useNewUrlParser: true });

app.get('/', function(req, res) {
    // Use connect method to connect to the Server
    client.connect(function(err) {
        res.writeHead(200, { "Content-Type": "text/html;charset=UTF8" });
        if (err) {
            res.send("数据库连接失败");
            return;
        }
        assert.equal(null, err);
        res.write("恭喜,数据库已经成功连接 \n");
        console.log("Connected successfully to server");
        const db = client.db(dbName);
    });
})
app.listen(8020)
2
3
4
5
6
7
8
9
10
11
12
13
14
15
16
17
18
19
20
21
22
23
24
25
26
27
# 添加数据
const insertDocuments = function(db, callback) {
    // Get the documents collection
    const collection = db.collection('student');
    // Insert some documents
    collection.insertMany([
        { name: "静静" }, { name: "忽略了" }, { name: "baby" }
    ], function(err, result) {
        assert.equal(err, null);
        assert.equal(3, result.result.n);
        assert.equal(3, result.ops.length);
        console.log("Inserted 3 documents into the collection");
        callback(result);
    });
}
2
3
4
5
6
7
8
9
10
11
12
13
14
# 修改数据
const updateDocument = function(db, callback) {
    // Get the documents collection
    const collection = db.collection('student');
    // Update document where a is 2, set b equal to 1
    collection.updateOne({ a: 2 }, { $set: { b: 1 } }, function(err, result) {
        assert.equal(err, null);
        assert.equal(1, result.result.n);
        console.log("Updated the document with the field a equal to 2");
        callback(result);
    });
}
2
3
4
5
6
7
8
9
10
11
# 删除数据
const removeDocument = function(db, callback) {
    // Get the documents collection
    const collection = db.collection('student');
    // Delete document where a is 3
    collection.deleteOne({ a: 3 }, function(err, result) {
        assert.equal(err, null);
        assert.equal(1, result.result.n);
        console.log("Removed the document with the field a equal to 3");
        callback(result);
    });
}
2
3
4
5
6
7
8
9
10
11
# 显示数据
const findDocuments = function(db, callback) {
    // Get the documents collection
    const collection = db.collection('student');
    // Find some documents
    collection.find().toArray(function(err, docs) {
        assert.equal(err, null);
        console.log("Found the following records");
        console.log(docs)
        callback(docs);
    });
}
2
3
4
5
6
7
8
9
10
11
# 使用mongoose连接数据库
参考文档:https://cn.mongoosedoc.top/docs/index.html 以下仅是根据文档写的示例,具体看上面文档
var mongoose = require('mongoose');
mongoose.connect('mongodb://localhost/test', { useNewUrlParser: true })
var db = mongoose.connection
db.on('error', () => {
    console.log("连接失败")
})
db.on('open', () => {
    console.log('连接成功')
})
var kittySchema = mongoose.Schema({
    name: String
})

kittySchema.methods.speak = function() {
    var greeting = this.name ? "my name is " + this.name : "I dont have name"
}

var kitty = mongoose.model('kitty', kittySchema)
var miao = new kitty({ name: 'mimi' })
miao.speak()

// miao.save((err, miao) => {
//     if (err) {
//         console.log(err)
//     }
//     miao.speak()
// })

kitty.find((err, kittens) => {
    if (err) {
        console.log(err)
    }
    console.log(kittens)
})
2
3
4
5
6
7
8
9
10
11
12
13
14
15
16
17
18
19
20
21
22
23
24
25
26
27
28
29
30
31
32
33
34
# 给mongodb设置密码
WARNING
如果项目上线一定要设置密码,千万不能是小项目或者是练手的项目就不设置密码
# 给admin设置密码
- 切换到
admin数据库
use User
switched to db User
2
- 给admin设置用户名和密码
- user:用户名
- pwd:密码
- roles:用来设置用户的权限
db.createUser({user: 'root', pwd: '123456', roles: ['root']})
- 验证是否添加成功
db.auth(用户名,用户密码)
如果返回1则表示验证成功,如果是0则失败
- 给每个特定的库设置密码,拿test举例子
db.createUser({user:'admin',pwd:'admin123',roles: [{role:'readWrite',db:'test'}]})})
这行代码意思是 创建一个admin用户 给予读写权限 db表示该用户操作的数据库名
- 查看用户
show users
- 重新启动数据库并开启验证--auth
mongod --dbpath 存放数据库文件夹路径 --auth
- 连接数据库
- 第一种 shell端
C:\Users\wd001>mongo
MongoDB shell version v3.4.1
connecting to: mongodb://127.0.0.1:27017
MongoDB server version: 3.4.1
> use admin
switched to db admin
> db.auth('root','123456')
1
> show dbs
admin          0.000GB
list           0.000GB
local          0.000GB
2
3
4
5
6
7
8
9
10
11
12
- 第二种 代码连接
xxx.db('mongodb://your name: your pwd@ ip :27017/test');
your name:为用户名
your pwd:为密码
2
3
这一种连接过程可能失败,需要加上authSource=admin
mongoose.connect('mongodb://root:123456@127.0.0.1:27017/user?authSource=admin', { useNewUrlParser: true });
- 删除用户 删除用户必须由管理员来删除,所以,切到admin角色
use admin
db.auth("admin","password")
2
删除单个用户
db.system.users.remove({user:"XXXXXX"})
删除所有用户
db.system.users.remove({})